Original Hem Tutorial
- happyhomeblog1
- Jul 31
- 4 min read
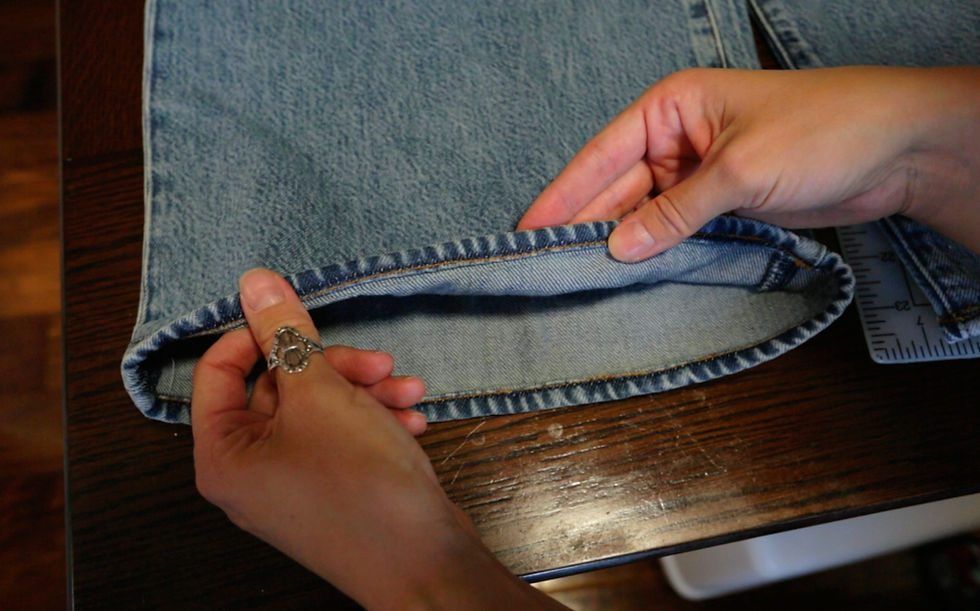
I'm a little over 5'4", which makes me too tall for petite, but still too short for some standard pant lengths. Because of this, I have to hem most of my pants. I liked the stone washing on the hem and I wanted to keep the original hem on this pair of jeans. For me it depends on the fabric if I decide to keep the original hem or just do a standard hem. Here are two options to achieve an original hem alteration: The first option, you will need just a sewing machine and the second option you will need a sewing machine and a serger. For either option, you need to try on your pants and pin the length where you want them.
Option 1
With the pants turned inside out you will mark up the full measurement you're planning on removing, including the hem. In my case, that will be 2 1/4 inches, this will be the stitch line.
Then fold the bottom of the pant leg up half of the length of the amount you're removing, excluding the hem. In my case it's 7/8 of an inch. You'll want to line up your stitch line and double check that the measurement looks correct. Then pin it. Then pick a thread that is close in color to the pants that you're hemming. Next, change the foot on your machine to a zipper foot and move your needle to the left side position. Remove your pins as you begin to stitch. You don't want your needles to hit your pins. If you did a good job, your stitches should be right on top of the line you made.
Grab your fabric scissors and cut the excess off, leaving about a half inch of fabric. Take a seam ripper and open up your original hem. I like to cut away some of the excess fabric from the inseam, so it's not as hard to run through the machine. After opening the hem with the seam ripper, tuck the excess hem you made Into the original hem. Make sure it's a little shorter than the original hem allowance so that it'll fit inside, I hope this makes sense.
Once you enclose your new hem within your original hem, carefully pin it in place. Then switch your thread to a matching color top stitch thread. Swap to a standard foot and begin your top stitch. Remove your pins as you sew. You might want to walk your stitches over the side seams so you don't break your needle. When complete your finished hem should look very close to a non-altered version of the pant.
Option 2
Unlike the first version, we will be cutting this pant leg beforehand. Grab your jeans and measure the amount that you'll be removing. In my case, with this pair of pants, I need to shorten them by an 1 3/4 inches. I'm going to turn the pants inside out and mark them 1 3/4" up from the bottom edge. The difference between a standard hem and an original hem is that you'll need to measure your hem length and add that to the amount that you'll be removing. In my case it's a 1/2 inch, which I will mark up from my first line. I like to use a chalk pen to do this, you can get these in different colors off Amazon.
The lower line closer to your hem is the cut line. The line above the cut line, is your stitch line. Cut your pants on the cut line. Take the cut piece and serge the raw edge. You should be left with under half an inch.
Then serge the pant leg side. If you don't have a serger, you can zig zag stitch the edges. With your seam ripper, open up your original hem. Once you open it, you'll line up the inside and outside stitches and make sure they're on the right side. You can mark this with the chalk pen to help you remember which sides line up with each other.
Make sure the outer part of the pants are touching each other. Then pin together. Attach your zipper foot to your machine and move the needle to the left. Then sew along your stitch line and remove the pins as you go around. Then you open the original hem and enclose the new hem within it. Pin It. Then swap to a standard foot and begin your top stitch. Remove your pins as you sew. Walk your stitches over the side seams so you don't break your needle. And you're done.
I believe Option 2 Is the easier of the 2 methods, but either option will get the job done. If you want a visual aid, here's the link to our youtube video. Enjoy your freshly hemmed pants while maintaining the look of an unaltered pair of jeans.
DISCLOSURE: This site contains affiliate links, meaning we get a commission if you decide to make a purchase through the included links, at no cost to you.


Comments